
Can You Hydro Dip Metal Car Parts? Here’s the Truth
Last Updated: October 26, 2026
Quick Summary
Yes, you can hydro dip metal car parts. You can hydro dip metal such as aluminum, steel, and chrome-plated pieces, but metal needs more careful prep than plastic because nothing soaks into the surface. The film sits on a primer and base coat, so adhesion depends entirely on what you build underneath it.
- Metal is non-porous, so the coating has no mechanical grip unless you scuff the surface first.
- Scuff bare aluminum with 180- to 320-grit, then apply a metal-compatible etching primer within the product’s specified window.
- Bare steel rusts fast, so degrease, scuff, and prime in the same session with a direct-to-metal epoxy primer.
- Lower the part into the tank at an angle, usually 30 to 45 degrees, and push through smoothly.
- Keep dipped finishes on covers, trim, and brackets that see airflow, away from direct radiant heat.
Table of Contents
- Can You Hydro Dip Metal Car Parts? The Short Answer
- How to Hydro Dip Metal: The Step-by-Step Process
- Metal Hydro Dipping Preparation: Where Most Dips Fail
- Hydro Dipping Clear Coat: The Layer That Decides Durability
- Hydro Dipping vs Cerakote for Metal Car Parts
- Heat, Chemicals, and Wear: What Metal Parts Can Take
- Troubleshooting Peeling, Bubbles, and Dull Patterns
- Ordering a Custom Hydro Dipped Part for Your Corvette
- Frequently Asked Questions
Can You Hydro Dip Metal Car Parts? The Short Answer
Yes, you can hydro dip metal car parts. The process works on aluminum, steel, and chrome-plated pieces, though metal needs more careful prep than plastic because nothing soaks into the surface.
At AMT Custom Designs, we finish metal and plastic parts in-house, and the metal jobs live or die on prep.
Below, we walk through the full process, the prep mistakes that ruin metal dips, and how the finish compares to Cerakote.
How to Hydro Dip Metal: The Step-by-Step Process
Hydro dipping metal is a three-stage job: prep the surface, lay the foundation coats and float the film, then activate and dip. Each stage has its own failure points. Here is the sequence we follow.
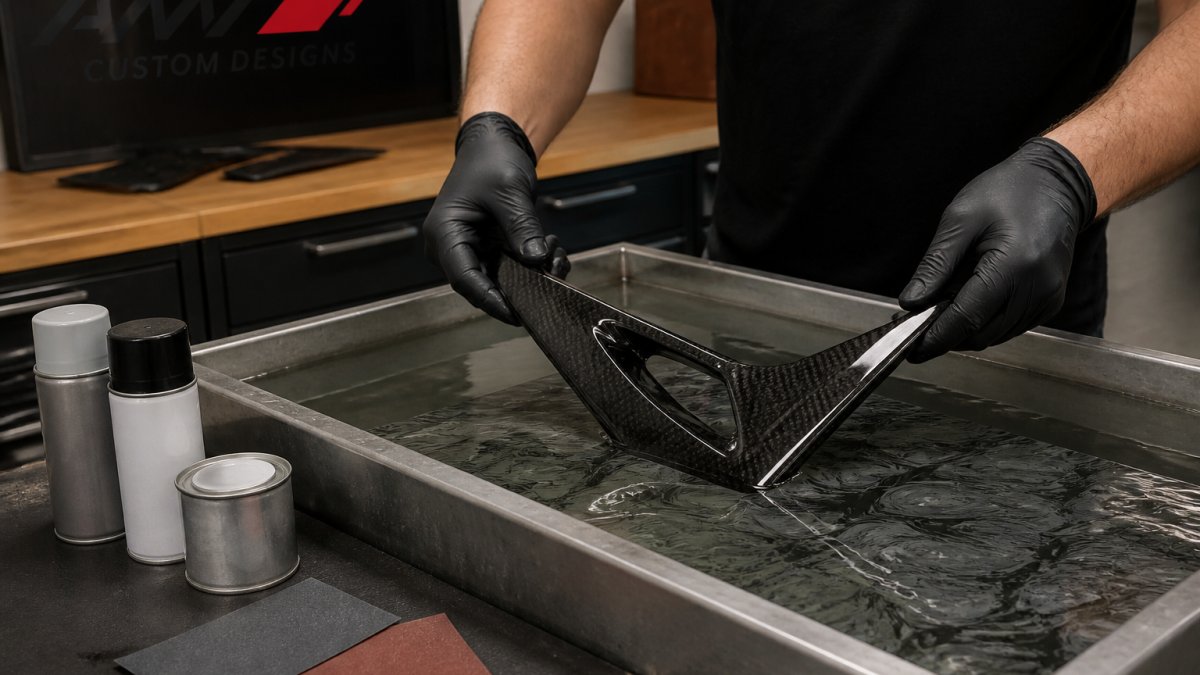
Step 1: Strip, Degrease, and Scuff the Substrate
Clean metal is the whole ballgame. Strip any old paint or coating first, then degrease with a wax and grease remover. Scuff the surface with a scuff pad or fine sandpaper so the primer has something to bite into. Wipe it down again and let it dry completely.
Step 2: Prime, Base Coat, and Hydrate the Film
Spray an etching primer made for metal, then a base coat in the color that best supports your pattern. While the base coat flashes, lay your hydrographic film on the water tank and let it hydrate. Most films need a minute or two to soften before they will wrap curves without tearing.
Step 3: Activate, Immerse, and Rinse
Spray activator evenly across the film. It turns the film into a floating ink layer. Lower the part in at an angle, usually 30 to 45 degrees, and push through smoothly. Rinse off the residue, let it dry, then clear coat it.
Metal Hydro Dipping Preparation: Where Most Dips Fail
Most failed metal dips trace back to prep, not the film. Metal is non-porous, so the coating has no mechanical grip unless you create one, and the right prep depends on which metal you are holding. Treating every part the same is the fastest way to a finish that lifts at the edges.
Match the prep to the substrate
- Bare aluminum. Aluminum forms a thin oxide layer almost immediately after sanding, and that oxide is a release surface for primer. Scuff with 180- to 320-grit, then apply a metal-compatible etching primer or a self-etching wash primer within the window the product data sheet specifies, often within an hour of sanding. Polished or anodized aluminum needs a real mechanical tooth, not a light wipe; anodizing should be removed in the visible areas before primer.
- Steel and iron. Bare steel rusts fast, so degrease, scuff, and prime in the same session. A direct-to-metal epoxy primer gives the most reliable base for a base coat and film. Any flash rust means starting the scuff over.
- Chrome and polished trim. The film will not bond to a slick chrome surface. Either scuff aggressively to break the shine and prime with an adhesion-promoting primer, or strip the chrome where the part allows it. Small trim pieces are often easier to strip than to scuff evenly.
- Powder-coated or painted parts. The dip bonds to the existing coating, not the metal, so the old finish has to be sound. Feather chips, scuff the whole part, and confirm the old coating is not lifting before you build on it.
The prep sequence that holds
- Strip any old paint, coating, or anodizing from the areas the film will cover.
- Degrease twice with a wax and grease remover, paying attention to seams, bolt holes, and folded edges where oil hides.
- Scuff with a scuff pad or 180- to 320-grit so the primer has a mechanical bite.
- Wipe down again and let the part dry completely, solvent trapped in a seam will bubble through later.
- Prime with a primer rated for the specific metal, then let it cure for the full time on the data sheet before the base coat goes on.
Watch Out
Rushed primer is the most common cause of edge lift on metal. If the primer is still off-gassing when the base coat and film go on, the trapped solvent finds the edges first.
Rushed primer is the most common cause of edge lift on metal. If the primer is still off-gassing when the base coat and film go on, the trapped solvent finds the edges first.
A common mistake is treating metal like plastic. Plastic absorbs a little and forgives sloppy prep. Metal does not. If you are unsure whether a part is aluminum, steel, or pot metal, test a hidden spot with a magnet and a scuff before you commit, pot metal and cast pieces can behave unpredictably under solvent.
Hydro Dipping Clear Coat: The Layer That Decides Durability
The clear coat is what makes a hydro dip last. Without it, the printed film is thin, soft, and easy to scratch. If you are still choosing a look, browse the best hydro dip patterns for car interiors.
Two rules matter here. First, use an automotive-grade clear, not a hardware-store spray can. Second, give it enough coats. Thin clear wears through on high-touch areas fast.
Hydro Dipping vs Cerakote for Metal Car Parts
Hydro dipping and Cerakote both finish metal, but they solve different problems. Cerakote is a ceramic-polymer coating sprayed and baked on. It is tough, heat-resistant, and comes in solid colors.
Choose Cerakote when you need maximum abrasion and heat protection on a working part and want a solid color.
Here is how the two finishes compare on the points that matter for metal car parts.
| Option | Best for | Key difference |
|---|---|---|
| Hydro dipping | Engine covers, trim, and show pieces where a pattern sells the build | Wraps a printed pattern around the part for carbon fiber, camo, skulls, or custom graphics |
| Cerakote | Maximum abrasion and heat protection on a working part | Ceramic-polymer coating sprayed and baked on; tough, heat-resistant, solid colors only |
Heat, Chemicals, and Wear: What Metal Parts Can Take
Engine bay parts face real heat and constant chemical exposure. A quality automotive clear coat handles a lot, but there are limits, and the limits depend on where the part sits and what touches it.
Heat: location matters more than the part
A cured automotive clear coat is typically comfortable on parts that see airflow and underhood ambient heat.
A practical rule: keep dipped finishes on covers, trim, brackets, and dress-up pieces that see airflow, and move the dip away from direct radiant heat. If a part must sit near a heat source, a heat-reflective backing or a different coating system is the better call.
Chemicals: what strips a clear coat
- Brake cleaner and harsh solvents will attack clear coat quickly. Keep them off dipped parts.
- Carb and throttle body cleaners are similarly aggressive; mask or remove dipped pieces before use.
- Fuel and oil are a slow problem rather than an instant one, repeated exposure softens edges and dulls the finish over time.
- Bug and tar removers vary widely; test on a hidden spot first.
For routine cleaning, mild soap and water is the safe default. Keep a pressure washer at a distance and off the edges, where clear is thinnest.
Wear: where it shows first
Edges, bolt holes, and high-touch surfaces wear first because the clear is thinnest there and takes the most contact. Check those spots after a season of driving. A light polish on intact clear restores gloss; once the clear is breached, the film underneath is exposed and the fix is a recoat, not a touch-up.
Pro Tip
Before dipping a valuable part, spray a test panel of the same metal with the same primer, base, film, and clear, then leave it in the engine bay for a season. It is the cheapest durability test you can run.
Before dipping a valuable part, spray a test panel of the same metal with the same primer, base, film, and clear, then leave it in the engine bay for a season. It is the cheapest durability test you can run.
Troubleshooting Peeling, Bubbles, and Dull Patterns
Peeling usually means poor adhesion. The cause is almost always oil left on the metal or primer applied before the surface was fully dry. Strip it, clean it, and start over.
Bubbles come from trapped air. Dip the part slower and at a steeper angle so air escapes ahead of the film. Dull patterns point to a different issue: too little activator, or activator sprayed unevenly. The film never fully softens, so the ink looks flat.
- Peeling edges: re-scuff and re-prime
- Bubbles: slow the immersion and adjust the angle
- Dull pattern: check activator coverage and film hydration time
Ordering a Custom Hydro Dipped Part for Your Corvette
If DIY sounds like a lot of trial and error, we do it for you. AMT Custom Designs builds custom Corvette accessories in-house, including hydro dipped and painted finishes on engine bay dress-up packages, clear engine covers, frunk covers, door props, and tonneau inserts.
Every piece is GM Licensed, and we can add custom graphics to make it unique to your build. Browse all of our products to see current finishes, or check our warranty policy before you order. Our guide to C8 Corvette engine bay customization ideas pairs well with a dipped cover.
Our customers notice the difference. As Glenn I. put it after receiving his C8 coupe engine cover: “The quality is top notch. Well worth the wait and I love how it looks in the engine bay.”
Frequently Asked Questions
Does hydro dipping work on metal?
Yes. Hydro dipping bonds a printed film to metal through an activator, but the film itself sits on top of a base coat rather than fusing into the metal. That means adhesion depends on how well the part was degreased, scuffed, and primed before the dip. Aluminum and steel both take a pattern well when the surface is clean and the clear coat is applied properly afterward. Skip the prep and the pattern will lift at edges and bolt holes within months.
Do metal parts need primer before hydro dipping?
They do. Bare or polished metal gives the film nothing to grip, so a primer and base coat go on first. The base coat also sets the tone of the finished pattern: a light base brightens a carbon fiber film, a dark base deepens it. For metal hydro dipping preparation, scuff the part, degrease it, spray primer, then base coat, and let each layer cure before the tank. Rushing the primer is the most common reason a dip fails.
Which is better for metal car parts, Cerakote or hydro dipping?
They solve different problems. Cerakote is a sprayed ceramic coating built for heat and chemical resistance, which suits exhaust components and parts that see solvent exposure. Hydro dipping wins on pattern choice: carbon fiber, camo, woodgrain, and custom graphics that Cerakote cannot reproduce. For engine bay dress-up and interior trim where looks matter most, hydro dipping gives you far more design freedom. For high-heat or heavily chemical-exposed metal, Cerakote holds up better.
How long does hydro dipping take to cure?
The dip itself takes minutes, but curing is the long part. After rinsing and drying, the part needs a clear coat, and that clear needs time to harden before the part goes back on the car. Plan on several days from dip to install, and longer in cool or humid shop conditions. Installing a part before the clear coat fully cures traps solvent and leads to soft, easily marred finishes.
Metal takes more prep than plastic, and that is exactly why a clean metal dip stands out at a car show. If you would rather skip the tank and the sanding, let us handle it. AMT Custom Designs offers GM Licensed parts, in-house hydro dipped and painted finishes, and custom graphics built around your Corvette. Get started with AMT Custom Designs and give your engine bay a finish nobody else at the meet has.
