
5 Alternatives to Standard GM Interior Trim
Last Updated: October 29, 2026
Quick Summary
Five alternatives to standard GM interior trim are overlay trim covers, aftermarket interior parts, door sill protection, custom graphics and painted finishes, and fastener and grommet upgrades. Overlay covers sit over your factory panels without removal, while fastener upgrades keep every panel sitting flush.
- Overlay covers need no removal of door panels or dash pieces and are reversible.
- Door sills take a beating from every entry and exit, so sill covers shield the factory surface.
- Polypropylene trim needs a dedicated polyolefin adhesion promoter or paint and film lift at the edges.
- Replace retainers while a panel is off, since the incremental cost is small and fit improves immediately.
- Start with the piece you see most, which for most C8 owners is the door sill or dash.
Table of Contents
- Why Standard GM Interior Trim Leaves Owners Wanting More
- Alternative 1: Overlay Trim Covers That Sit Over Factory Panels
- Alternative 2: The Best Aftermarket Parts for C8 Corvette Interiors
- Alternative 3: C8 Corvette Door Sill Protection That Doubles as Styling
- Alternative 4: Custom Graphics and Painted Finishes on Trim Pieces
- Alternative 5: Fastener and Grommet Upgrades for a Cleaner Fit
- Comparing the Five Options: Cost, Effort, and Durability
- Choosing Your GM Interior Trim Upgrade Path
- Frequently Asked Questions
Why Standard GM Interior Trim Leaves Owners Wanting More
Walk the aisles at any car show and you can spot the factory-fresh interiors from twenty feet away. Standard GM interior trim does its job, but it rarely makes anyone stop and stare.
That gap between “fine” and “unforgettable” is where customization lives. At AMT Custom Designs, we spend our days helping Corvette owners close it with overlay covers, sill protection, and custom graphics that sit right on top of the factory pieces.
Alternative 1: Overlay Trim Covers That Sit Over Factory Panels
The easiest upgrade is the one that never touches a screwdriver. Overlay covers are pieces designed to fit over your existing factory panels, so you can get a new look without pulling anything apart.
Here’s why this route wins for most owners:
- No removal of door panels or dash pieces
- Reversible if you ever want the factory look back
- Available with custom graphic finishes
- Protects the original surface underneath
How Overlay Covers Differ From Replacement Panels
Replacement panels require you to remove the factory piece entirely, which means clips, fasteners, and the risk of breaking a plastic grommet along the way. Overlay covers skip that whole process. They also preserve your OEM parts, which matters if you ever sell or trade the car.
If you want to see what a real overlay set looks like installed, our C8 interior dash trim covers show the fit and finish up close.
Alternative 2: The Best Aftermarket Parts for C8 Corvette Interiors
Searching for the best aftermarket parts for C8 Corvette interiors turns up a lot of noise. Pieces worth your time fit the C8 platform specifically.
We build our interior accents around those rules. Custom graphics let you carry a theme from the engine bay into the cabin, so the whole car reads as one build instead of a pile of unrelated parts.
Engine Bay and Cargo Area Dress-Up
Interior upgrades don’t stop at the doors. Cargo area covers clean up the trunk surfaces, and engine bay dress-up ties the whole presentation together when the hood comes up at a show. For a broader look at what’s available across the platform, our C8 aftermarket parts guide covers the full range of interior and dress-up options.
Alternative 3: C8 Corvette Door Sill Protection That Doubles as Styling
Door sills take a beating from every entry and exit. C8 Corvette door sill covers help shield the factory sill and can add a custom look.
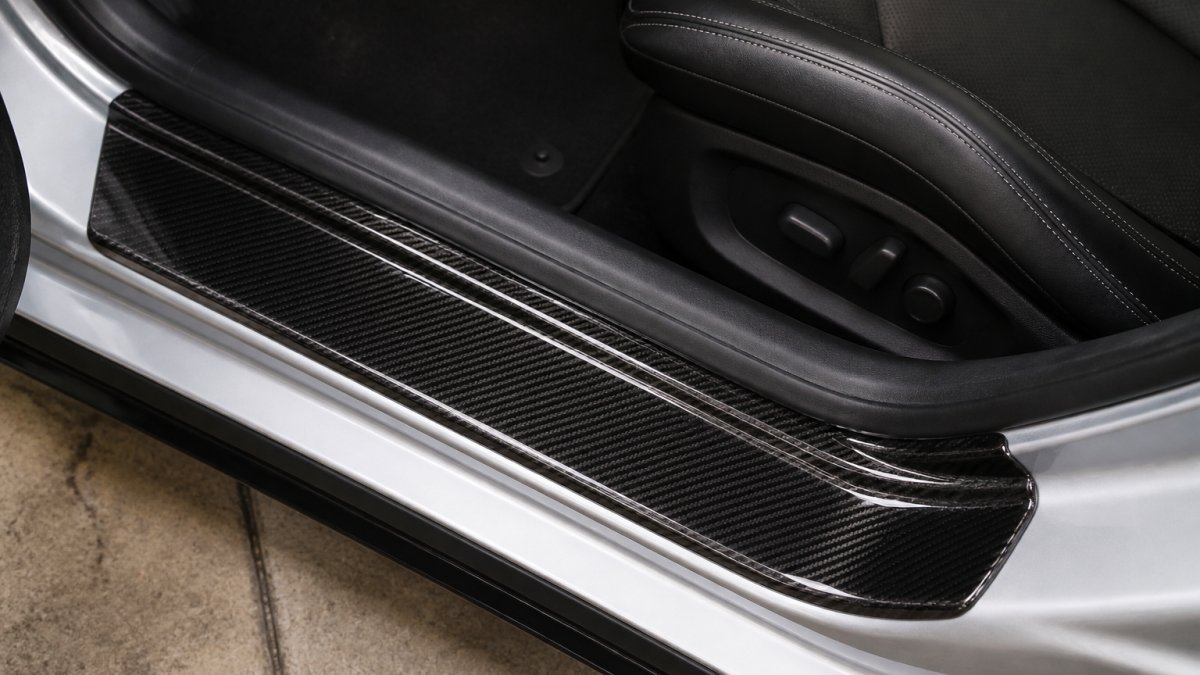
Our door sill covers are among our best sellers. They can be finished with custom graphics to match your build. If you want the protection without the wear, our C8 door sill plate covers are the direct route.
Alternative 4: Custom Graphics and Painted Finishes on Trim Pieces
Custom graphics let you match a color scheme or carry a theme across multiple pieces.
Match the finish to the substrate
GM interior trim is not one material. Door and dash panels are typically molded thermoplastics, ABS, polypropylene, or a PC/ABS blend, while higher-trim accents may be aluminum or a coated magnesium substrate. Each takes finish differently:
- ABS and PC/ABS accept paint and vinyl graphics well after scuffing and an adhesion promoter.
- Polypropylene is the difficult one. It has low surface energy, so paint and adhesive films need a dedicated polyolefin adhesion promoter or they lift at the edges.
- Aluminum and coated metal accents need scuffing and a self-etching or direct-to-metal primer; skipping that step is why metal trim chips first.
- Textured plastic hides grain through a thin finish. Either sand the texture down or choose a finish system designed to sit over texture without telegraphing it.
A prep sequence that holds up
Most practitioners follow a version of this order: clean with a wax-and-grease remover, scuff with a gray or red Scotch-Brite pad (not sandpaper, which gouges soft plastic), re-clean, apply adhesion promoter, then primer, then color, then clear. The clear coat is what seals the result against UV and daily handling, interior plastics see more UV through the glass than owners expect, and an uncleared finish fades and chalks within a couple of seasons.
Test your adhesion promoter and paint on a hidden section of the same panel first. A scrap piece of the same plastic is the only reliable predictor of how the finish will behave on the real part.
Custom graphics as a finish layer
Graphics can go on as painted stencils, as cut vinyl applied over a cured finish, or as printed film laminated under clear. Each has a trade-off: painted graphics are the most durable but the least reversible; vinyl is removable but sits proud of the surface and can lift at edges in high-touch areas; laminated film gives the sharpest detail but demands a perfectly flat substrate.
The safety angle most guides skip
This is the part competitors leave out. Trim near the side windows and the A- and B-pillars can sit in the deployment path of side-curtain airbags, and some trim pieces house sensors or clip into structures the airbag system depends on. Before you paint, wrap, or add thickness to any trim in those zones:
- Do not add material over or in front of an airbag deployment seam or a trim piece marked with an airbag warning.
- Do not block or cover sensors, and do not change the thickness of a panel that clips into an airbag module cover.
- Keep finishes thin in deployment zones; a thick overlay or heavy clear can change how a cover splits.
If you are unsure whether a piece is in a deployment path, treat it as if it is and leave it alone. No show trophy is worth compromising a safety system.
Reversibility and resale
If you may return the car to stock, favor overlay covers over permanent changes to factory panels, and keep the original pieces stored.
Alternative 5: Fastener and Grommet Upgrades for a Cleaner Fit
Loose trim rattles. Rattles read as cheap. A plastic grommet that has aged out or a fastener that no longer bites will let a panel sit uneven, and no finish work hides a bad fit. This is the least glamorous of the five alternatives, but it is the one that decides whether the other four look factory-installed or thrown on.
Identify the material before you buy a fastener
GM cabins mix materials in a single door: molded plastic panels, aluminum or magnesium substrate pieces on higher trims, and steel or aluminum body-side mounting points.
A common pattern among C8 owners is that the door panel and sill-area retainers are the first to fatigue, because those are the panels that get removed most often for audio, lighting, or trim work.
The removal step nobody budgets for
Most broken clips are broken on the way out, not the way in. A proper nylon trim removal tool, the wedge-and-fork set, not a flathead screwdriver, spreads the load across the clip instead of prying one edge. Work around the perimeter of the panel, popping a clip every few inches rather than levering from one corner. If a clip resists, stop and slide the tool closer to that clip; forcing it shears the retainer and leaves half of it in the body-side hole.
A clip that fights you on removal is already worn. Do not reinstall it. Reusing a fatigued retainer is the single most common cause of a rattle that returns a week after the job.
Reinstall sequence that keeps panels flush
- Seat new grommets and retainers in the body-side holes first, not on the panel.
- Align the panel’s top edge and the beltline before pressing any clip home.
- Press clips in with even thumb pressure, working from the center outward.
- Hand-start any screws or bolts, then snug them in a cross pattern. Do not torque plastic-threaded fasteners to metal-fastener specs, snug plus a quarter turn is the working rule most technicians use.
- Recheck beltline and door panel seating after the first open-and-close cycle; a panel that shifts is a clip that did not fully seat.
What this buys you
A full retainer refresh is inexpensive in parts and mostly patience in labor, and it is the difference between an overlay cover that looks integrated and one that looks bolted on. It also protects the factory pieces underneath, which matters if you ever return the car to stock. If you are already pulling a panel for another upgrade, replace the retainers while you are in there, the incremental cost is small and the fit improvement is immediate.
Comparing the Five Options: Cost, Effort, and Durability
Here’s the honest breakdown. None of these paths is wrong, but they suit different owners.
| Option | Effort | Reversible | Durability | Best For |
|---|---|---|---|---|
| Overlay trim covers | Low | Yes | Good with proper care | Owners who want a fast visual change |
| Aftermarket interior parts | Low to moderate | Yes | Good | Building a themed interior |
| Door sill protection | Low | Yes | High, protects factory surface | High-traffic daily use and shows |
| Custom graphics and paint | Moderate to high | Harder to reverse | Depends on prep quality | Owners chasing a one-off look |
| Fastener and grommet upgrades | Low | Yes | High | Fixing rattles and uneven panels |
Before you commit to any option, confirm the part fits your exact model. Our guide on how to verify custom part fitment covers the checks that save you a return shipment.
Choosing Your GM Interior Trim Upgrade Path
Start with the piece you see most. For most C8 owners that’s the door sill or the dash, which is why overlay covers and sill protection deliver the biggest visual return for the least effort. Add finish work and fastener upgrades as your build grows.
Pricing depends on the part, quantity, and delivery details, so check our website for current prices or a quote.
Frequently Asked Questions
How can I customize my C8 Corvette interior without replacing factory parts?
Overlay pieces are the simplest route. These parts install directly over the existing factory trim, so you keep the original panels intact and skip the removal work entirely. Door sill covers, interior accents, and trunk covers are common starting points. Many of these pieces can be ordered with custom graphics, which lets you personalize the look without touching the factory hardware.
What are the best aftermarket parts for C8 Corvette interiors?
Start with the areas you see and touch most: door sills, interior accent pieces, and trunk covers. Door sill covers protect a high-traffic area while adding a visible styling element. Trunk upper and lower covers clean up the cargo area for show presentation. Interior accents let you carry a theme through the cabin. Look for parts made specifically for the C8 platform rather than universal pieces, since model-specific fitment matters more than a long feature list.
Are custom interior trim pieces easy to install on a Corvette?
Overlay-style pieces fit over existing components. Follow the maker’s instructions for installation.
Can I add custom graphics to my Corvette interior trim?
Yes. We can add custom graphics to many of our parts so they match your build or theme.
What is the best way to protect factory door sills in a C8 Corvette?
Door sill covers are the most direct answer. The sill is one of the highest-traffic areas in the car, and scuffs show up quickly on the factory finish. A fitted cover shields that surface while adding a custom look. Look for a set designed specifically for the C8. This dual-purpose approach protects the factory part and upgrades the appearance at the same time.
Your Corvette already turns heads. The interior is where you make it yours. AMT Custom Designs builds GM Licensed overlay covers, door sill protection, trunk covers, and custom graphics in-house, with finishes tailored to your build and parts designed to install over your factory trim. Get started with AMT Custom Designs and give your cabin the show-car detail it’s missing.
