
How to Clear Coat Hydro Dipped Parts for a Lasting Finish
Last Updated: October 30, 2026
Quick Summary
Yes, hydro dipping needs a clear coat if you want the pattern to last, because the film is thin and has almost no protection of its own. The clear coat hydro dipped parts receive seals the pattern, adds depth, and lets you choose gloss or matte. Without it, the design fades, dulls, and wears through.
- An unprotected dipped film can look perfect on day one and hazy within months.
- Rinse the dipped item with clean water to remove activator residue, then air dry in a dust-free space.
- Four coats is a common target for a durable finish, applied as light coats rather than one wet coat.
- Two-part urethane clear in an aerosol with a breakable hardener button builds the hardest, most solvent-resistant film.
- Test compatibility on a scrap panel carrying the same base coat and film before spraying the part.
Table of Contents
- Does Hydro Dipping Need Clear Coat? The Direct Answer
- What Happens to a Hydro Dip Without Clear Coat
- How to Clear Coat Hydro Dipped Parts Step by Step
- Choosing the Best Clear Coat for Hydro Dipping
- How Long Does Hydro Dipping Last?
- Troubleshooting Common Clear Coat Defects
- Safety and Application Precautions
- Ordering a Custom Hydro Dipped Part for Your Corvette
- Frequently Asked Questions
Does Hydro Dipping Need Clear Coat? The Direct Answer
Yes, hydro dipping needs a clear coat if you want the pattern to last. The film itself is thin and sits on top of the base coat, so it has almost no protection of its own.
The clear coat is the protective coating that seals the hydrographic film. It locks in the pattern, adds depth, and gives you a choice of gloss or matte finish.
What Happens to a Hydro Dip Without Clear Coat
An unprotected dipped item starts breaking down faster than most people expect. The hydrographic film is measured in microns, and once the activator dries, that film sits exposed. There is no barrier between the pattern and the outside world.
How UV Light and Abrasion Break Down an Unprotected Film
Sunlight does the first damage. UV rays attack the film’s pigments and the resin holding the pattern, so colors chalk and fade.
Abrasion does the rest. Hands, keys, cleaning cloths, and road grit all scratch an uncoated film. Each scratch opens the pattern to water and dirt, and the edges start to lift.
Watch out: a dipped part with no clear coat can look perfect on day one and hazy within months.
How to Clear Coat Hydro Dipped Parts Step by Step
Clearing a dipped part is a sequence, and the order matters more than the brand on the can. Rushing any step shows up in the finish. Here is the process we follow.
- Let the dip dry fully. Give the film time to cure before you touch it. Rushing this step traps solvent under the top coat.
- Rinse gently. Rinse the dipped item with clean water to remove activator residue. Do not scrub the fresh film.
- Air dry in a dust-free space. Water left in a seam or edge will cause defects later.
- Prep the surface. Lightly check for dust nibs or film edges. Fix problems now, not after coating.
- **** Most clear coat cans need a full minute of shaking to mix the resin and hardener.
- Apply light coats. Build thin layers rather than one wet coat. Keep the can moving at a steady distance.
- Let each coat flash off. Follow the can’s recoat window. Four coats is a common target for a durable finish.
- Cure fully before handling. Give the part real cure time, not just dry-to-touch time.
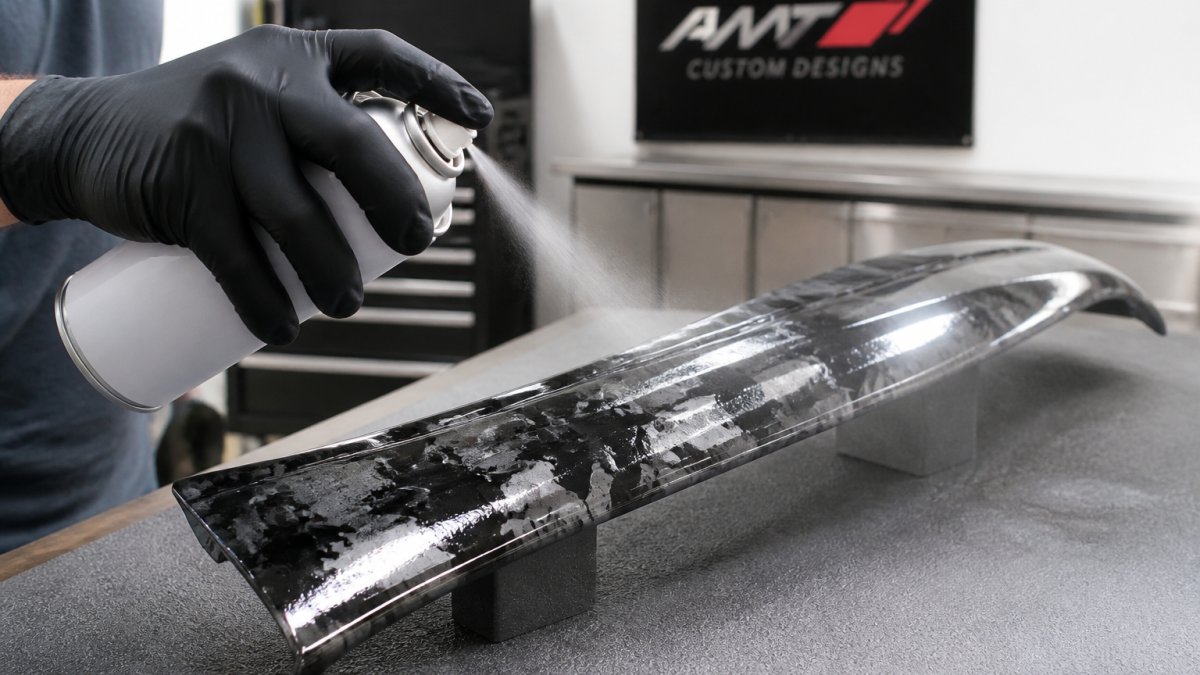
Drying Time, Coats, and Environmental Conditions
Drying time depends on temperature, humidity, and the product. Cool, humid air slows the solvent flash and stretches cure times. Warm, dry air speeds it up.
Coat count matters too. One heavy coat looks wet and glossy, then sags or traps solvent. Multiple thin coats build depth without the risk. Aim for even coverage across the whole part, and pay extra attention to edges and corners where the film is most exposed.
Choosing the Best Clear Coat for Hydro Dipping
A clear coat should be compatible with both the base coat and the hydrographic film, and rated for the exposure the part will see.
The main coating types and where each fits
- Two-part urethane (2K) clear in an aerosol with a breakable hardener button. This is the closest thing to a shop-grade clear in a can. Once the hardener is activated, pot life is short, often around 24 to 48 hours, so plan to use the whole can. It builds the hardest, most solvent-resistant film and is the usual pick for parts that see sun, cleaning chemicals, and handling.
- One-part acrylic or lacquer clear in an aerosol. No hardener, longer shelf life, easier for a beginner. The trade-off is softer film, weaker UV and solvent resistance, and a greater tendency to re-dissolve if a solvent-heavy product is sprayed over it later.
- Matte and satin clears. These use flattening agents, so they cannot be sanded and polished back to a uniform sheen the way gloss can. If you want a matte look, buy a matte-specific product rather than dulling a gloss coat.
- Waterborne clears. Lower solvent load and less odor, but they are more sensitive to humidity during application and need good airflow to release water.
How to check compatibility before you spray
Compatibility problems show up as wrinkling, lifting, or a cloudy haze, and they usually appear within minutes of the first coat. Test on a scrap panel that carries the same base coat and the same film, not on bare metal. Spray one light coat, wait the full flash time on the label, then spray a second. If the film lifts or the pattern wrinkles, the clear’s solvent is attacking the layer below, switch to a milder product or extend the film’s dry time before coating.
Two more checks worth doing:
- Recoat window. Most aerosol clears specify a window (commonly within about an hour, or after 24 hours once fully cured). Spraying between those points, after the coat has skinned but before it has cured, is a common cause of lifting.
- Base coat compatibility. Some base colors and film activators leave a residue that a solvent clear will pick up. A clean water rinse and full dry before coating reduces that risk.
Pro Tip
Buy two cans of the same product for a full part. Running out mid-coat and switching products is one of the most common ways to create a visible blend line or a compatibility failure.
Buy two cans of the same product for a full part. Running out mid-coat and switching products is one of the most common ways to create a visible blend line or a compatibility failure.
Matching the product to the finish and the part
For parts that live in sun, prioritize UV protection on the label; for parts that get handled, prioritize hardness and solvent resistance. To see which finishes pair well with a clear coat, browse the Best Hydro Dip Patterns for Car Interior: Top Styles.
How Long Does Hydro Dipping Last?
How long hydro dipping lasts depends almost entirely on the top coat and on what the part is exposed to. A properly cleared part that stays out of direct sun and heavy handling can hold up for years. An uncleared part may look dull within a single season of sun and handling. The useful way to think about it is by stressor, because each one attacks the finish differently.
What each stressor does to the finish
- UV light. Sun breaks down the film’s pigments and the resin holding the pattern, so colors chalk and fade. A clear with UV inhibitors slows that; a craft clear without them does not. Parts near a window or on an exterior surface fade first.
- Water and humidity. Water creeps under film edges that are not sealed. A continuous top coat that wraps the edges keeps moisture out; a thin or skipped coat lets it in, and the pattern lifts from the edge inward.
- Heat and thermal cycling. Parts that heat and cool repeatedly, near an engine bay, in a car that sits in the sun, expand and contract. A hard, well-bonded clear flexes with the part; a brittle or poorly adhered coat cracks and lets moisture in at the cracks.
- Abrasion and handling. Hands, keys, rings, cleaning cloths, and road grit scratch an uncoated film. Each scratch opens the pattern to water and dirt. Parts that are touched often, sills, handles, trim you brush getting in and out, wear fastest.
- Chemicals. Interior cleaners, sunscreen, and bug spray can stain or soften a soft clear. A solvent-resistant 2K clear resists them better than a one-part acrylic.
Matching the coating to the use case
| Exposure | What matters most | Coating direction |
|---|---|---|
| Direct sun, exterior | UV protection, hardness | 2K urethane with UV inhibitors |
| Frequent handling | Abrasion resistance, edge wrap | Multiple thin coats, sealed edges |
| Heat cycling | Flexibility, adhesion | Fully cured 2K, proper base prep |
| Low-touch interior | Appearance, easy cleanup | Gloss or matte clear matched to finish |
How to make a dipped part last longer
Three things drive longevity, and all three are in your control:
- Coating quality: a UV-rated automotive clear outlasts a craft clear.
- Coating thickness: multiple thin coats beat one thick coat, and edges need full coverage.
- Use and care: parts that get touched or scrubbed wear faster, so clean with a mild product and a soft cloth rather than an abrasive pad.
Water resistance comes from the clear, not the film. The film alone lets moisture creep under edges. A sealed top coat keeps water out and holds the pattern in place. If a part does start to fail, the usual first sign is dulling or edge lift, both are easier to correct early than after the pattern has worn through.
Troubleshooting Common Clear Coat Defects
Most clear coat problems trace back to application, not the product. Knowing the defects helps you fix them fast.
| Problem | Likely Cause | Fix |
|---|---|---|
| Cloudy or hazy finish | Moisture or high humidity | Work in drier air, add flash time |
| Runs and sags | Coat too heavy or can too close | Thin coats, steady distance |
| Orange peel texture | Cold product or fast passes | Warm the can, slow the passes |
| Lifting or wrinkling | Paint compatibility issue | Test first, switch products |
| Dull spots | Uneven coverage | Add thin coats to even it out |
A common mistake is trying to fix a defect by spraying more clear over it. That usually makes it worse. Let the coat cure, sand the defect back if needed, then recoat in thin layers.
Safety and Application Precautions
Clear coat aerosol is a solvent product, and it needs respect. Spray outdoors or in a well-ventilated space. Wear a respirator rated for organic vapors, plus gloves and eye protection. Keep the can away from heat and open flame.
Follow the label’s safety guidance, and check the OSHA hazard communication guidance for solvent handling basics. If you spray indoors, a fan moving air out of the space is not enough on its own; you need fresh air coming in.
Ordering a Custom Hydro Dipped Part for Your Corvette
AMT Custom Designs builds custom Corvette accessories in-house, including hydro-dipped finishes and custom graphics that make a part unique to your car.
We make trunk upper and lower covers for the C8, plus door sill covers that protect the factory sills from scuffs. Door props, engine bay dress-up pieces, and interior accents round out the lineup.
Ready to order? Visit our website to see current options for your Corvette.
Frequently Asked Questions
Does hydro dipping need a clear coat?
Yes, in almost every case. The hydrographic film itself is thin and offers little protection against UV light, abrasion, or water. A clear coat seals the design, adds UV protection, and gives you the gloss or matte finish you want. Without it, the pattern can fade, dull, or wear away faster, especially on parts exposed to sunlight or frequent handling.
How long should hydro dip paint dry before clear coating?
Let the dipped item air dry completely before topcoating. Let the part dry fully before topcoating, and check that the surface feels dry and the pattern looks set before you spray.
How many coats of clear coat should you apply over a hydro dip?
Thin coats reduce runs and give better adhesion than one heavy coat. Build up gradually, then let the final coat cure fully.
What clear coat works best for hydro dipping?
Confirm that any clear coat you pick is compatible with the base coat and film, and follow the manufacturer’s recoat window and cure times.
Your Corvette deserves a finish that looks as sharp at the show as it does in your garage. AMT Custom Designs handles the dip and the clear coat in-house, with GM Licensed parts, custom graphics, and finishes built for real-world wear. Get started with AMT Custom Designs and give your Corvette a look that is uniquely yours.
